How to make your own homemade Twix…. and for some reason they taste better the next day, these were incredibly good! The trickiest part is the caramel consistency but get that right and you’ll be flying! Here’s how to make them…
Oh and if you want to check out Phoebe’s website, head here.
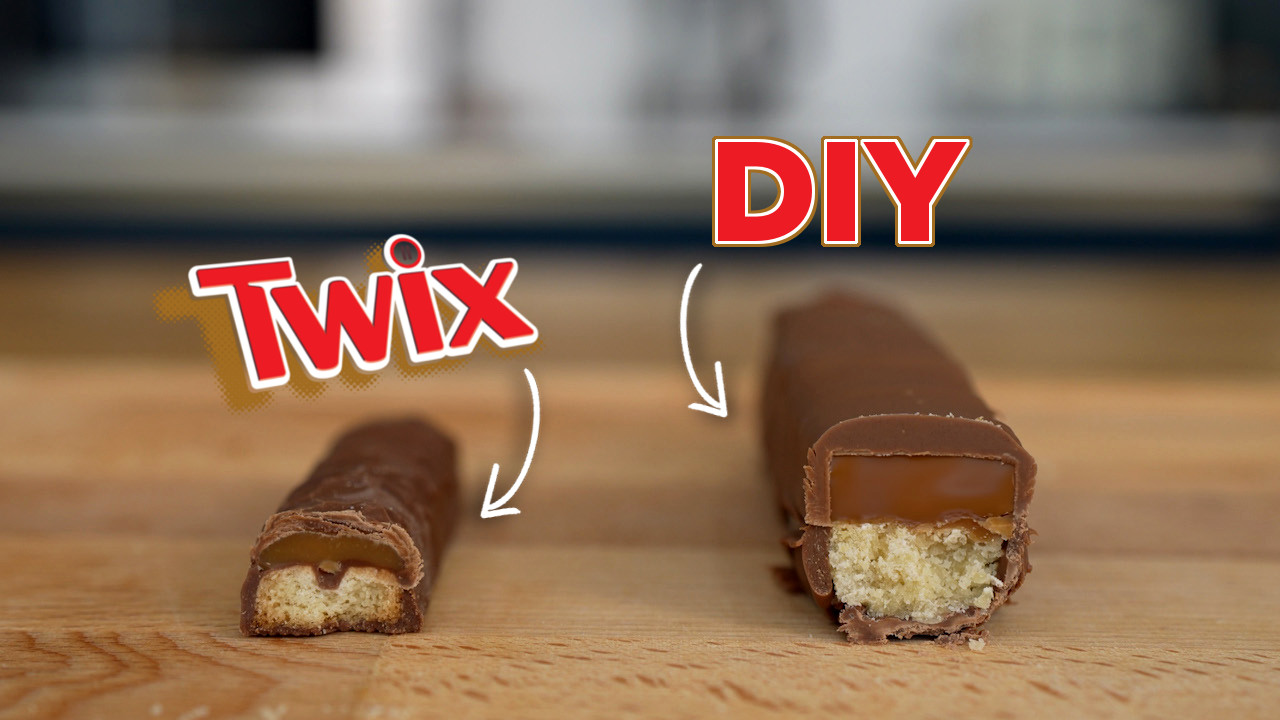
Homemade Twix Bars
The biscuit base
First up we make the biscuit base. Mix all of the biscuit ingredients together in a bowl to merge and then press into a lined baking tray approx 20cm x 20cm. In the video I used a larger 30cm x 20cm pan and ended up using more mix, but as you’ll see the base was pretty good size, so press it down firmly and evenly into the pan and make a call, it won’t rise much. Leave a lip of baking parchment to help lifting it out easier and prick the top of the biscuit base with a fork. Bake in an oven at 350f/180c/160Fan or equivalent until the edges start to go golden, this is approx 25 minutes or so. Leave to cool once out of the oven in the tray.
The Caramel filling
The trickiest part, use a candy thermometer and keep it stirring gently and you’ll be fine. It will burn if you don’t watch it like a hawk.
Into a saucepan add the condensed milk, both sugars, golden syrup, cream, butter and the salt. Warm this mixture gently until it starts to bubble, stirring frequently, ensuring you scrape the base of the saucepan all over to stop it burning and warm evenly.
Keep stirring and heating it until a candy thermometer reads 240F and no more, it’ll be very hot and dangerous on the way to this temperature so be careful and gently keep stirring – did I mention that enough! Once it reaches that temperature remove from the heat and pour oven your cooling biscuit base, allow to cool to room temperature (will happen surprisingly fast) and then place in the fridge to set.
If you’ve done you heating right the sugar crystal structure (taking it to 240F) will help create a lovely chewy caramel. If you don’t go high enough it’ll not set and be floppy and too hot it will be like a rock! Perfect this and it’ll taste stunning I promise!
The Chocolate Layer
You have 2 options here, drench it or do it gradually like I do in the video to create ripples. If you want to drench it, once your caramel is set, slice thin strips of the caramel biscuit mixture and lay on a wire rack, pouring over the chocolate (just melt it in a microwave on 30 second blasts stirring in between) to cover the caramel and biscuit, allow to cool to room temperature then place in the fridge to set.
Alternatively, like me, brush melted chocolate along the bottom of the biscuit and let it set in the fridge. For me this stops it sticking to the wire rack as much. You can then optionally pipe bumbs onto the surface of the caramel and place this in the freezer to set, before pouring over the rest of the chocolate to coat the piped chocolate lines (video shows this well) and the rest of the top and sides. Allow to set fully before keeping in an air tight container! For some reason they taste even better the next day but they should last around 5-7 days if you don’t get them gone by then!